
Every transformative modern technology—from EV drivetrains to precision medical sensors—relies on an invisible powerhouse: the magnetic area.
But here is the catch: what engineers and technical buyers casually call a magnetic area is actually a highly complex, dynamic manyetik alanın. If you miscalculate its boundaries, or pair it with the wrong ferromanyetik malzemeler, your entire system’s efficiency can collapse.
Optimizing this functional magnetic force zone isn’t just about spatial layout; it requires a precise calculation of manyetik akı yoğunluğu and strategic material selection. Whether you need the raw power of nadir toprak mıknatısları gibi Neodyum mıknatıslar (NdFeB) or the extreme thermal endurance of Samaryum Kobalt (SmCo) mıknatıslar, choosing the right substrate changes everything.
In this guide, we will break down the exact physics that shape a manyetik alanın, map out how different kalıcı manyetik malzemelerden yapılmıştır alter your field geometry, and show you how to engineer the perfect zone of influence for your application.
Hemen başlayalım.
Ever wondered why a magnet pulls strongly at one exact spot, but barely registers a few inches away? We hear from engineers every day who struggle to predict exactly how their magnetic force zone will behave in real-world applications. When you are designing a product, you can’t rely on guesswork. You need to know exactly how your magnetic area expands, contracts, and interacts with surrounding components.
Let’s break down the actual physics of mapping this zone and look at the core metrics that dictate performance.
Mapping the Zone
To visualize a magnetic area, we map out the invisible manyetik alan çizgilerinin that loop from the north to the south pole. This area isn’t a uniform cloud; it is a dynamic gradient. The closer the lines are to each other, the stronger the physical pull. When we design custom systems, mapping this 3D space allows us to predict exactly where a component will engage or release.
[Image of magnetic field lines around a permanent magnet]
Key Metrics That Define a Magnetic Area
You cannot manage what you do not measure. When we evaluate a magnetic area for industrial applications, we focus on three non-negotiable metrics:
- Magnetic Flux Density: Measured in Gauss or Tesla, this tells us the actual concentration of magnetic energy passing through a specific surface area.
- Manyetik Alan Gücü: This defines the magnet’s inherent ability to resist external demagnetizing forces and maintain its reach.
- Tutma Gücü: The physical peak weight the magnet can pull when making direct contact with ferromanyetik malzemeler.
| cURL Too many subrequests by single Worker invocation. To configure this limit, refer to https://developers.cloudflare.com/workers/wrangler/configuration/#limits | What It Measures | Why It Matters to Your Design |
|---|---|---|
| Flux Density (Gauss) | Field concentration | Determines sensor triggers and precision control. |
| cURL Too many subrequests by single Worker invocation. To configure this limit, refer to https://developers.cloudflare.com/workers/wrangler/configuration/#limits | cURL Too many subrequests by single Worker invocation. To configure this limit, refer to https://developers.cloudflare.com/workers/wrangler/configuration/#limits | cURL Too many subrequests by single Worker invocation. To configure this limit, refer to https://developers.cloudflare.com/workers/wrangler/configuration/#limits |
| cURL Too many subrequests by single Worker invocation. To configure this limit, refer to https://developers.cloudflare.com/workers/wrangler/configuration/#limits | cURL Too many subrequests by single Worker invocation. To configure this limit, refer to https://developers.cloudflare.com/workers/wrangler/configuration/#limits | cURL Too many subrequests by single Worker invocation. To configure this limit, refer to https://developers.cloudflare.com/workers/wrangler/configuration/#limits |
cURL Too many subrequests by single Worker invocation. To configure this limit, refer to https://developers.cloudflare.com/workers/wrangler/configuration/#limits
cURL Too many subrequests by single Worker invocation. To configure this limit, refer to https://developers.cloudflare.com/workers/wrangler/configuration/#limits
- cURL Too many subrequests by single Worker invocation. To configure this limit, refer to https://developers.cloudflare.com/workers/wrangler/configuration/#limits cURL Too many subrequests by single Worker invocation. To configure this limit, refer to https://developers.cloudflare.com/workers/wrangler/configuration/#limits
- cURL Too many subrequests by single Worker invocation. To configure this limit, refer to https://developers.cloudflare.com/workers/wrangler/configuration/#limits cURL Too many subrequests by single Worker invocation. To configure this limit, refer to https://developers.cloudflare.com/workers/wrangler/configuration/#limits
cURL Too many subrequests by single Worker invocation. To configure this limit, refer to https://developers.cloudflare.com/workers/wrangler/configuration/#limits manyetik alan gücü cURL Too many subrequests by single Worker invocation. To configure this limit, refer to https://developers.cloudflare.com/workers/wrangler/configuration/#limits
cURL Too many subrequests by single Worker invocation. To configure this limit, refer to https://developers.cloudflare.com/workers/wrangler/configuration/#limits
cURL Too many subrequests by single Worker invocation. To configure this limit, refer to https://developers.cloudflare.com/workers/wrangler/configuration/#limits magnetic area cURL Too many subrequests by single Worker invocation. To configure this limit, refer to https://developers.cloudflare.com/workers/wrangler/configuration/#limits
cURL Too many subrequests by single Worker invocation. To configure this limit, refer to https://developers.cloudflare.com/workers/wrangler/configuration/#limits
cURL Too many subrequests by single Worker invocation. To configure this limit, refer to https://developers.cloudflare.com/workers/wrangler/configuration/#limits magnetic area cURL Too many subrequests by single Worker invocation. To configure this limit, refer to https://developers.cloudflare.com/workers/wrangler/configuration/#limits
- Neodimyum Mıknatıslar (NdFeB): cURL Too many subrequests by single Worker invocation. To configure this limit, refer to https://developers.cloudflare.com/workers/wrangler/configuration/#limits magnetic area cURL Too many subrequests by single Worker invocation. To configure this limit, refer to https://developers.cloudflare.com/workers/wrangler/configuration/#limits
- Samaryum Kobalt (SmCo) Mıknatıslar: cURL Too many subrequests by single Worker invocation. To configure this limit, refer to https://developers.cloudflare.com/workers/wrangler/configuration/#limits magnetic area cURL Too many subrequests by single Worker invocation. To configure this limit, refer to https://developers.cloudflare.com/workers/wrangler/configuration/#limits
cURL Too many subrequests by single Worker invocation. To configure this limit, refer to https://developers.cloudflare.com/workers/wrangler/configuration/#limits
Not every project requires extreme localized intensity. For many large-scale industrial magnet applications, traditional materials offer a more practical way to shape the magnetic area.
- Ferrit (Seramik) Mıknatıslar: These materials generate a wide, deeply penetrating magnetic area at a fraction of the cost. They are highly resistant to corrosion and excel in capturing ferrous contaminants across broad conveyor belts.
- Alnico Mıknatıslar: Known for their high magnetic field strength along their axis, alnico alloys are ideal for specialized applications like kalıcı mıknatıs jeneratörlerinin where temperature stability is critical.
| Mıknatıs Türü | Manyetik Alan Şiddeti | Maliyet Verimliliği | Sıcaklık Direnci |
|---|---|---|---|
| Neodimyum (NdFeB) | Ultra-Yüksek | Orta | Düşük ile Orta |
| Samaryum Kobalt (SmCo) | Yüksek | Premium | Çok Yüksek |
| Ferrit (Seramik) | Düşük ila Orta | Mükemmel | Yüksek |
| Alnico | Orta ile Yüksek | Orta | Ultra-Yüksek |
Choosing the right material ensures the resulting magnetic area matches both your spatial constraints and your performance targets perfectly.
Industrial Factors Influencing the Performance of a Magnetic Area
A magnetic area does not operate in a vacuum. In heavy industrial environments, maintaining a stable magnetic force zone depends heavily on external physical factors. If you do not account for geometry, heat, and opposing fields, your magnetic performance will suffer.
Geometric Design & Shape
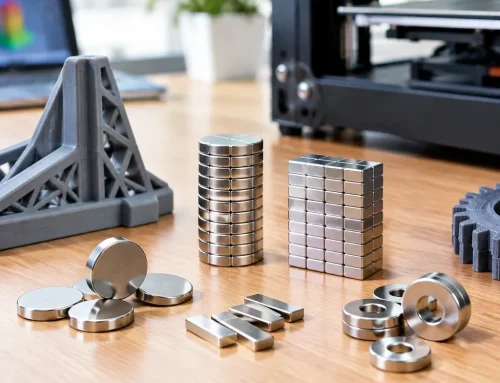
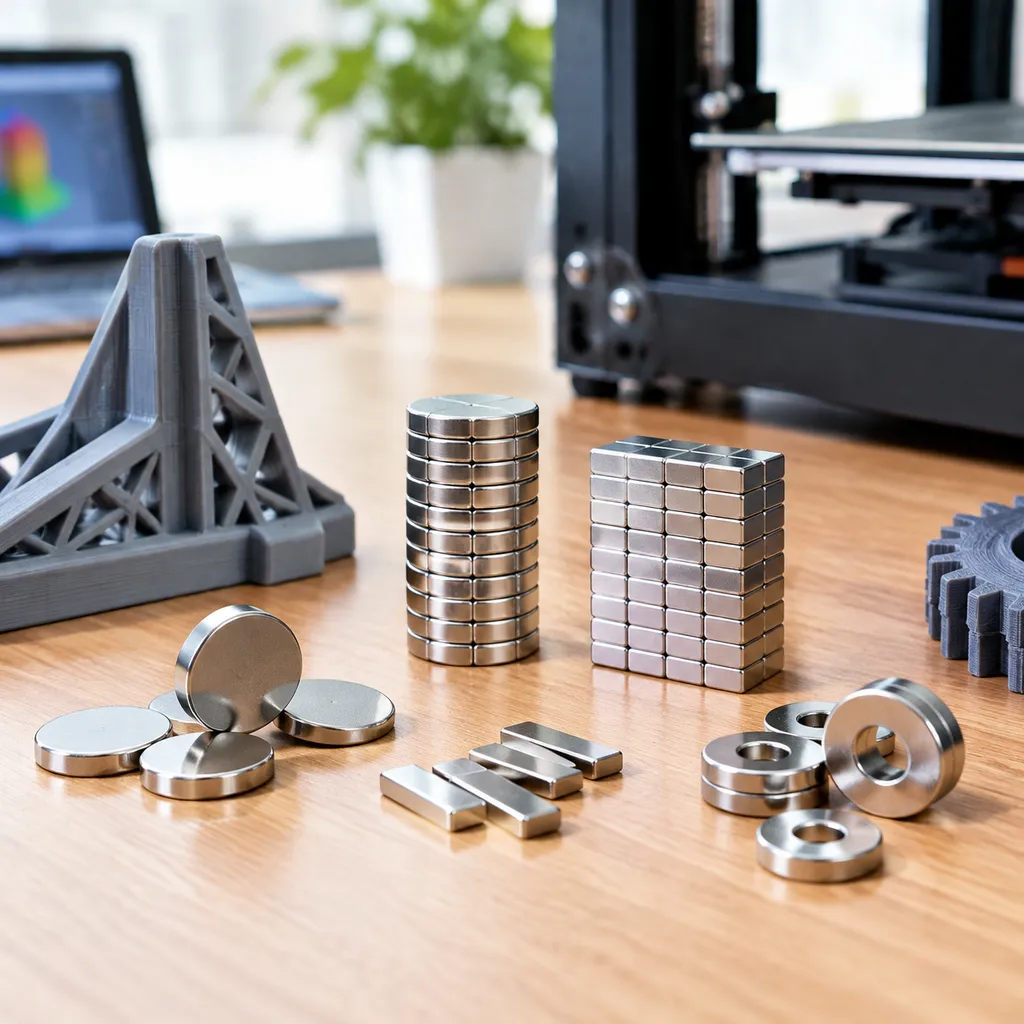
The physical shape of a permanent magnet dictates how its manyetik alan çizgilerinin spread across a target space. Standard blocks, discs, and rings project entirely different field profiles.
- Sharp Corners: Can cause localized field concentration but are prone to chipping.
- Rounded Profiles: Help optimize manyetik akı yoğunluğu across a uniform surface area.
- Thickness vs. Width: A thicker magnet pushes the magnetic area further out, while a wider magnet creates a broader but shallower field.
Temperature & Thermal Stability
Heat is the ultimate enemy of magnetic efficiency. Every material has a specific threshold where it begins to lose its grip.
| Mıknatıs Türü | Maximum Operating Temp | Key Risk Factor |
|---|---|---|
| Neodyum mıknatıslar (NdFeB) | Up to 80°C – 230°C | Severe flux loss if baseline rating is exceeded |
| Samaryum Kobalt (SmCo) | Up to 300°C – 350°C | Excellent for yüksek sıcaklık mıknatısları tercih ederiz |
Exceeding these temperatures degrades the manyetik alan gücü. If you push past the Curie sıcaklığı, the damage becomes permanent, completely destroying the magnetic force zone.
Demagnetization Vulnerability
In industrial machinery, magnets regularly face harsh external opposition. Powerful electrical surges, physical impacts, and opposing magnetic fields can compromise a magnet’s internal alignment. Choosing kalıcı manyetik malzemelerden yapılmıştır with high demanyetik yıkımlara karşı direnç cURL Too many subrequests by single Worker invocation. To configure this limit, refer to https://developers.cloudflare.com/workers/wrangler/configuration/#limits
cURL Too many subrequests by single Worker invocation. To configure this limit, refer to https://developers.cloudflare.com/workers/wrangler/configuration/#limits
cURL Too many subrequests by single Worker invocation. To configure this limit, refer to https://developers.cloudflare.com/workers/wrangler/configuration/#limits magnetic area cURL Too many subrequests by single Worker invocation. To configure this limit, refer to https://developers.cloudflare.com/workers/wrangler/configuration/#limits
cURL Too many subrequests by single Worker invocation. To configure this limit, refer to https://developers.cloudflare.com/workers/wrangler/configuration/#limits
cURL Too many subrequests by single Worker invocation. To configure this limit, refer to https://developers.cloudflare.com/workers/wrangler/configuration/#limits magnetic areacURL Too many subrequests by single Worker invocation. To configure this limit, refer to https://developers.cloudflare.com/workers/wrangler/configuration/#limits
cURL Too many subrequests by single Worker invocation. To configure this limit, refer to https://developers.cloudflare.com/workers/wrangler/configuration/#limits
cURL Too many subrequests by single Worker invocation. To configure this limit, refer to https://developers.cloudflare.com/workers/wrangler/configuration/#limits
cURL Too many subrequests by single Worker invocation. To configure this limit, refer to https://developers.cloudflare.com/workers/wrangler/configuration/#limits magnetic area cURL Too many subrequests by single Worker invocation. To configure this limit, refer to https://developers.cloudflare.com/workers/wrangler/configuration/#limits
- cURL Too many subrequests by single Worker invocation. To configure this limit, refer to https://developers.cloudflare.com/workers/wrangler/configuration/#limits cURL Too many subrequests by single Worker invocation. To configure this limit, refer to https://developers.cloudflare.com/workers/wrangler/configuration/#limits
- cURL Too many subrequests by single Worker invocation. To configure this limit, refer to https://developers.cloudflare.com/workers/wrangler/configuration/#limits cURL Too many subrequests by single Worker invocation. To configure this limit, refer to https://developers.cloudflare.com/workers/wrangler/configuration/#limits
cURL Too many subrequests by single Worker invocation. To configure this limit, refer to https://developers.cloudflare.com/workers/wrangler/configuration/#limits
cURL Too many subrequests by single Worker invocation. To configure this limit, refer to https://developers.cloudflare.com/workers/wrangler/configuration/#limits magnetic area.
| cURL Too many subrequests by single Worker invocation. To configure this limit, refer to https://developers.cloudflare.com/workers/wrangler/configuration/#limits | cURL Too many subrequests by single Worker invocation. To configure this limit, refer to https://developers.cloudflare.com/workers/wrangler/configuration/#limits |
|---|---|
| cURL Too many subrequests by single Worker invocation. To configure this limit, refer to https://developers.cloudflare.com/workers/wrangler/configuration/#limits | cURL Too many subrequests by single Worker invocation. To configure this limit, refer to https://developers.cloudflare.com/workers/wrangler/configuration/#limits |
| cURL Too many subrequests by single Worker invocation. To configure this limit, refer to https://developers.cloudflare.com/workers/wrangler/configuration/#limits | cURL Too many subrequests by single Worker invocation. To configure this limit, refer to https://developers.cloudflare.com/workers/wrangler/configuration/#limits |
| cURL Too many subrequests by single Worker invocation. To configure this limit, refer to https://developers.cloudflare.com/workers/wrangler/configuration/#limits | cURL Too many subrequests by single Worker invocation. To configure this limit, refer to https://developers.cloudflare.com/workers/wrangler/configuration/#limits |
cURL Too many subrequests by single Worker invocation. To configure this limit, refer to https://developers.cloudflare.com/workers/wrangler/configuration/#limits
Commercial Sourcing: Partnering with NBAEM for Precision Magnetic Solutions
Introducing NBAEM
At NBAEM, we manufacture and supply high-performance permanent magnetic materials designed to meet strict industrial specifications. We control the entire production process to ensure every custom magnet delivers a predictable, highly stable magnetic area for your specific application. From prototyping to high-volume distribution, we provide global industries with dependable magnetic solutions that keep automated systems, sensors, and drive mechanisms running efficiently.
Why Global Engineers Choose NBAEM
Global engineering teams require consistency, tight tolerances, and materials that survive harsh operating environments. We eliminate the guesswork by matching your exact technical needs with the right material chemistry. Whether you need to compare a ferrit mıknatıs ile neodymium for cost-to-weight efficiency, or require specialty compounding, we deliver optimized solutions.
Our production advantages include:
- Custom Geometric Precision: Tailored shapes to focus your magnetic force zone exactly where it is needed.
- Advanced Machining: Specialized slicing, drilling, and grinding for complex designs without damaging material integrity.
- Termal Kararlılık: Magnetic solutions engineered to resist demagnetization in high-temperature environments.
| Özellik | Mühendislik Yararları | Global Industry Application |
|---|---|---|
| Advanced NdFeB Grades | Maximum energy density, compact magnetic area | Electric vehicles, robotics, aerospace |
| Tailored SmCo Solutions | High Curie temperature, excellent corrosion resistance | Marine sensors, heavy industrial pumps |
| In-House CNC Machining | Micron-level tolerances, zero edge chipping | Medical devices, precision instrumentation |
We streamline the sourcing journey with clear technical data, reliable supply chains, and direct engineering support, ensuring your localized production lines face zero downtime.

 Turkish
 English
 German
 Vietnamese
 Spanish (Mexico)
 Russian
 Polish
 Hindi
 Thai
 Malay
 Korean
 Japanese
 French
 Czech
 Danish
 Dutch
 Finnish
 Italian
 Portuguese (Brazil)
 Portuguese (Portugal)
 Slovenian
 Ukrainian
 Hebrew
 Scottish Gaelic
 Hungarian
 Tagalog
 Spanish (Spain)
 Serbian
 Indonesian
 Slovak
 Dutch (Belgium)
 Persian
 Arabic
 Romanian
 Estonian
 Greek
 Bulgarian

Yorum Yap